Hi folks,
Well my latest home mechanics task was to buy a 2nd hand TD04HL-15G straight flange turbo off eBay (about £70), buy a generic TD04 refurb kit (about £50 off eBay) and see what happens.
Here’s the outcome…
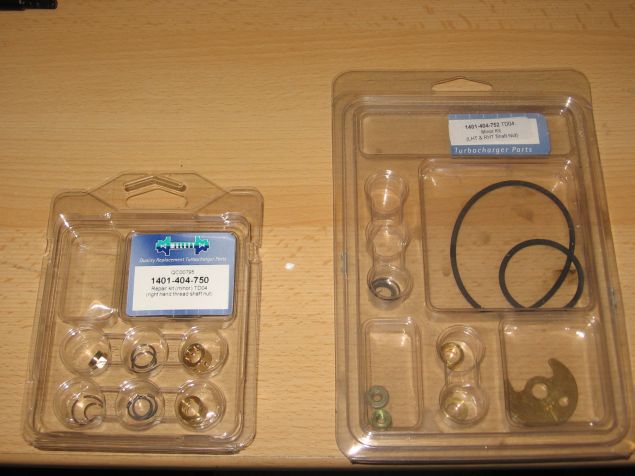
Here’s a shot of 2 different TD04 refurb kits off eBay. I ended up using the one on the right for the 15G. The contents were practically identical, I’ve got 2 kits because I’ve got a 19T to refurb next – this one was the practice one 🙂
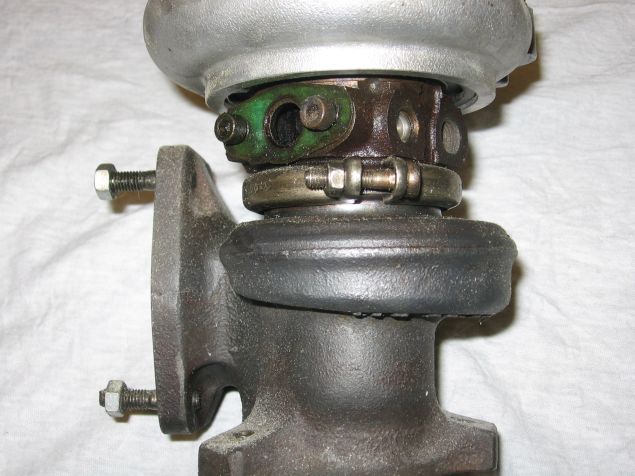
First step, undo the central band clamp with a 10mm socket:
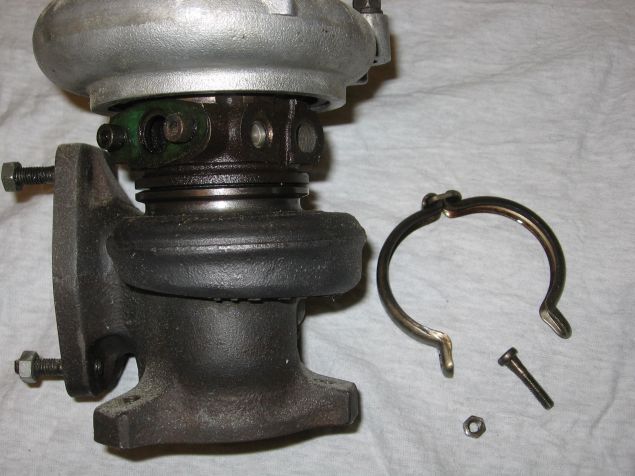
Now, carefully separate the exhaust side to reveal the exhaust turbine. I used a combination of light taps all round with a rubber mallet, and prizing a screwdriver or knife in the gap exposed by removing the band clamp:
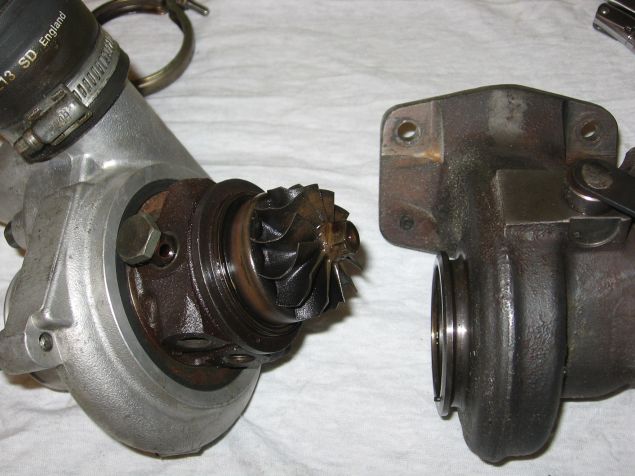
Remove any other bolts from the compressor housing and rotating assembly (CHRA for short). Here I’ve removed the oil inlet banjo bolt and oil return line gasket and bolts:
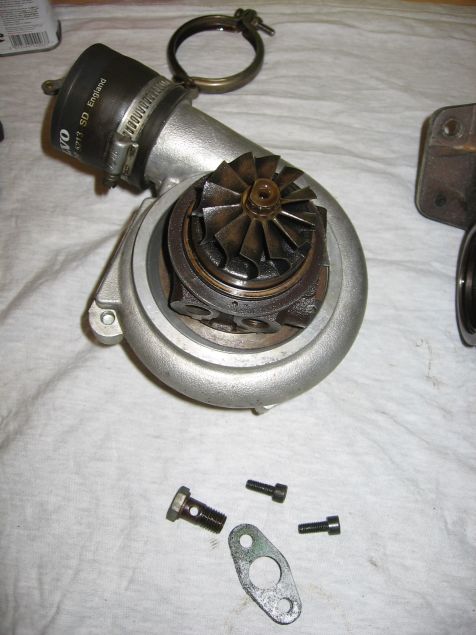
For the next step you need safety glasses and a set of fairly wide-opening circlip pliers:
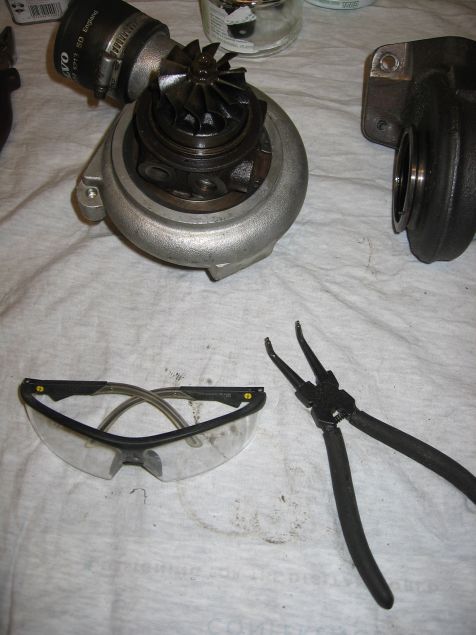
Once the main circlip holding the CHRA to the inlet housing, you can gently prise the CHRA assembley free. You may need to push it out using a suitable item inside the inlet to press against the compressor shaft:
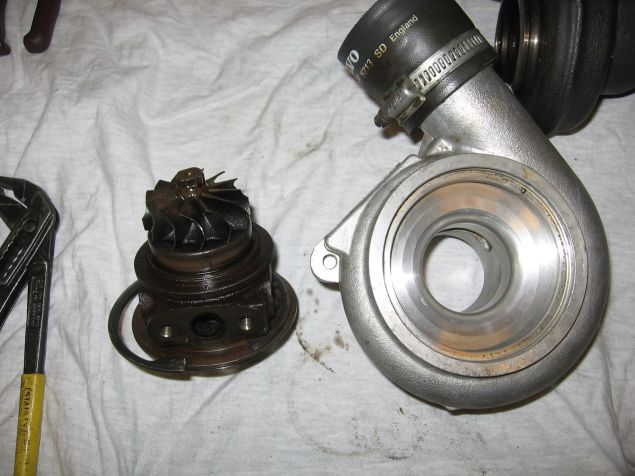
At this point, if you’re not taking the turbo somewhere to be re-balanced at the end (I didn’t) then you need to mark the relative position of the exhaust turbine against the compressor wheel. I chose one vane on the exhaust turbine, the one perpendicular to the flat of the nut. I lined it up against the locating hole on the CHRA:
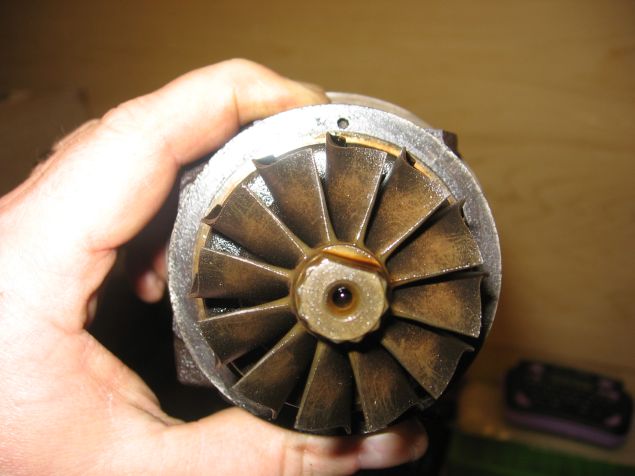
Without letting the exhaust turbine move, I turned it over to the compressor side. Note the downstroke of the ‘4’ – I simply marked a slight line with a fine file:
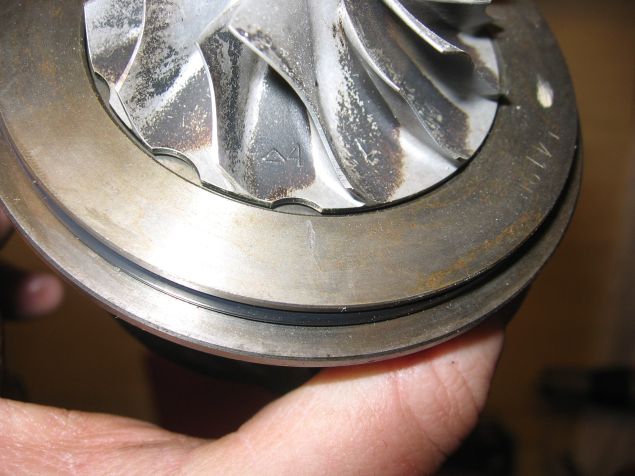
Now you can disassemble the rotating assembly. THE NUT IS REVERSE THREADED! Use a 12mm socket to hold the exhaust turbine still, and an 8mm socket or spanner on the compressor nut. Remember to turn the wrench as if to tighten, it’s reverse threaded don’t ya know 🙂
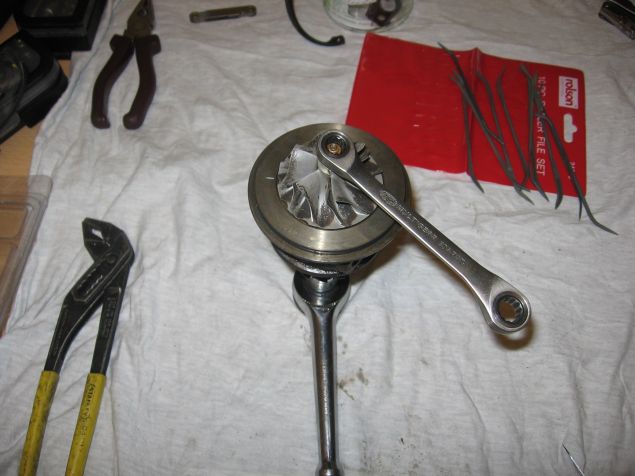
And there’s the nut removed:
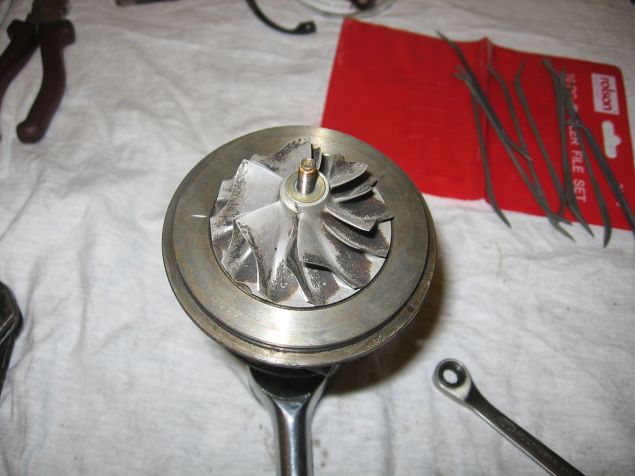
You can now remove the compressor wheel. Not looking so clean in there!
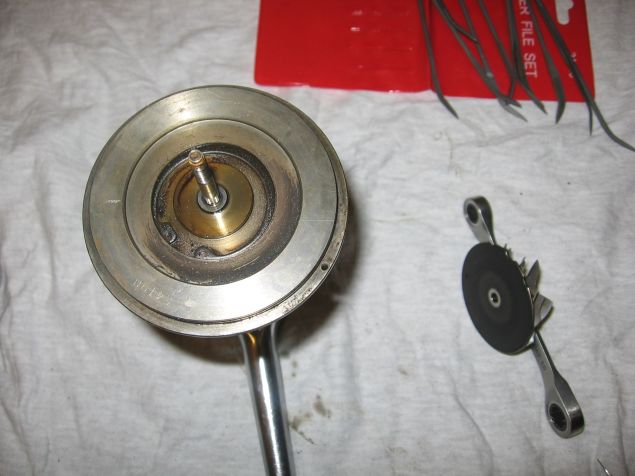
Remove the large O ring with a suitable tool (there should be a replacement in your kit):
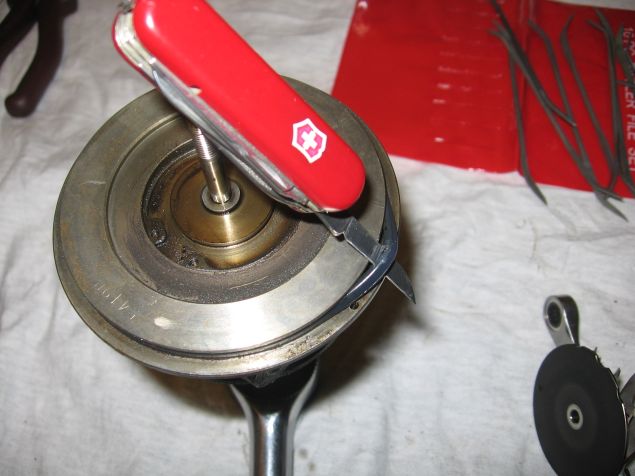
There’s the O ring removed:
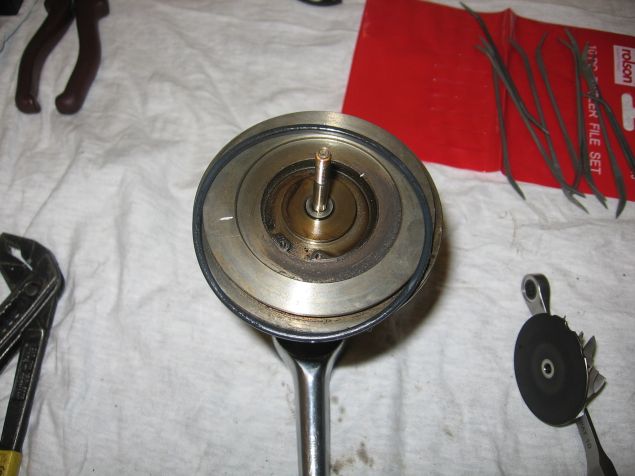
You can now remove the exhaust turbine and shaft from the CHRA – you may need to use gentle persuasion (see the rubber mallet in the picture 🙂 as it’s held in by a small spring washer:
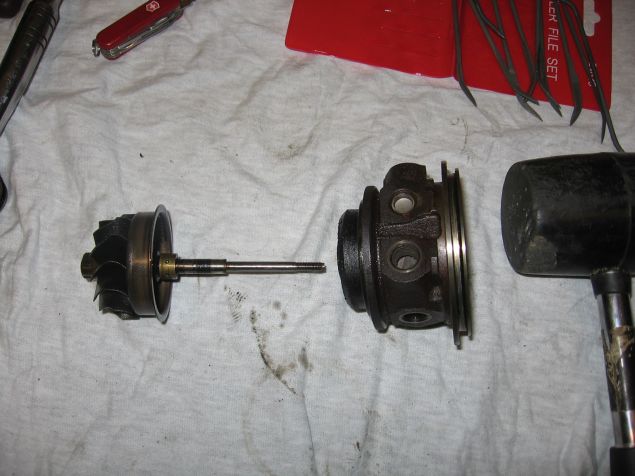
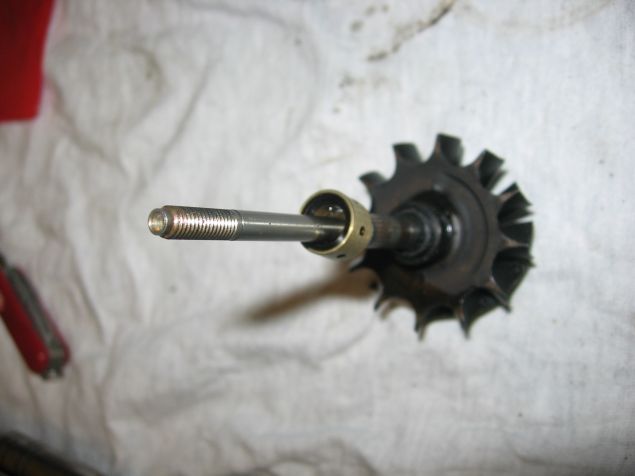
There’s a close-up of the removed exhaust turbine:
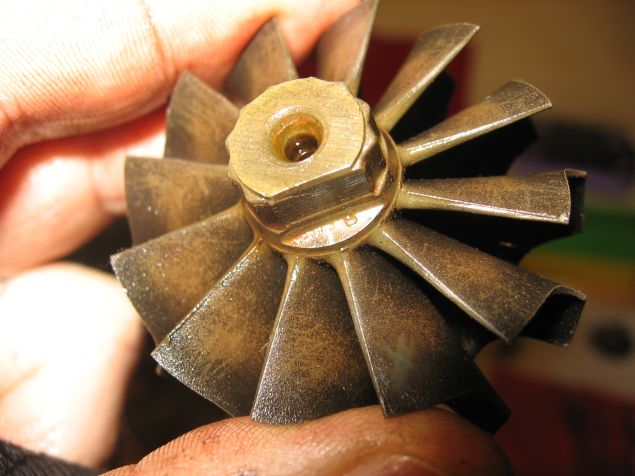
If the bearing came out with the shaft, remove it (your kit has a replacement). If not, retrieve it from the exhaust side of the CHRA. If it’s on the shaft, you may have to clean the shaft a bit before removal is possible, mine had a thick enough film of gunge to stop the bearing sliding off. I find cleaning with something softer than the target material works – so no steel wool or brass brushes, use a stiff nylon brush or green scouring pads (carefully if you must):
Another chance to blind yourself – use safety glasses as you remove the small circlip!
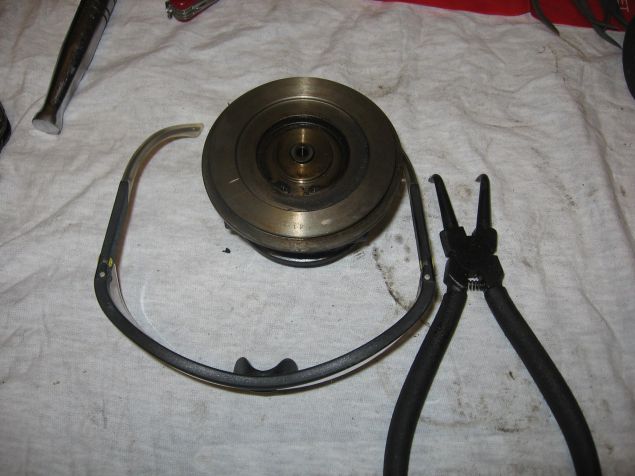
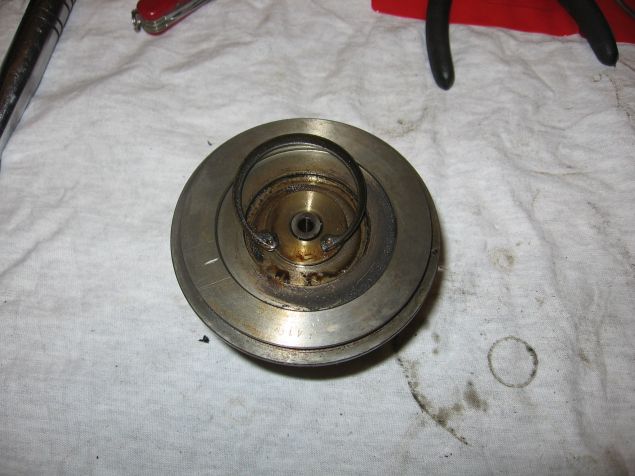
And there it is removed:
Next, use 2 flat blade screw drivers to carefully and evenly prise the compressor seal out of the CHRA:
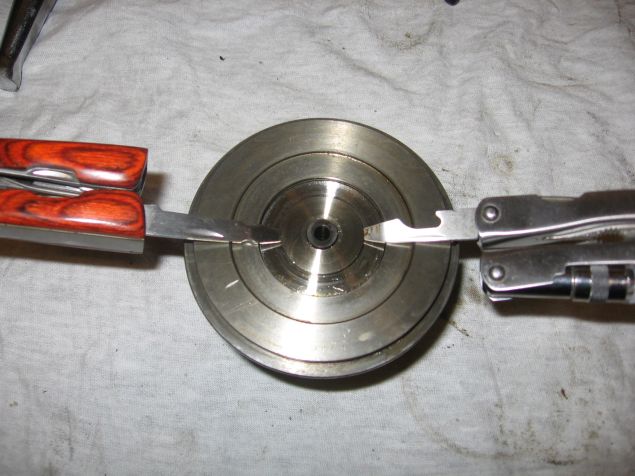
It will come out, probably bringing the insert beneath with it:
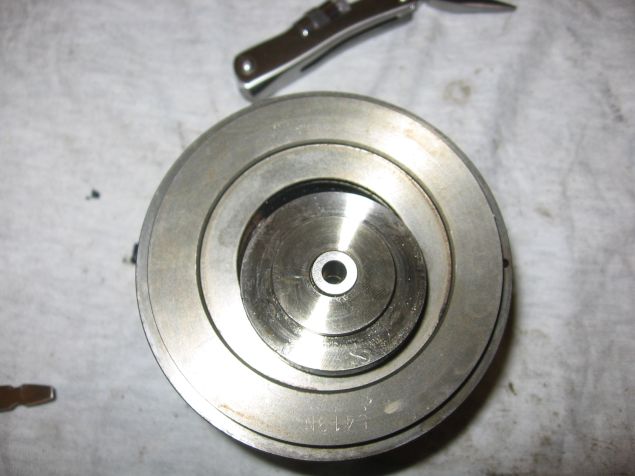
There’s the removed compressor seal and insert on the left, and the now-exposed bronze seal in the CHRA on the right:
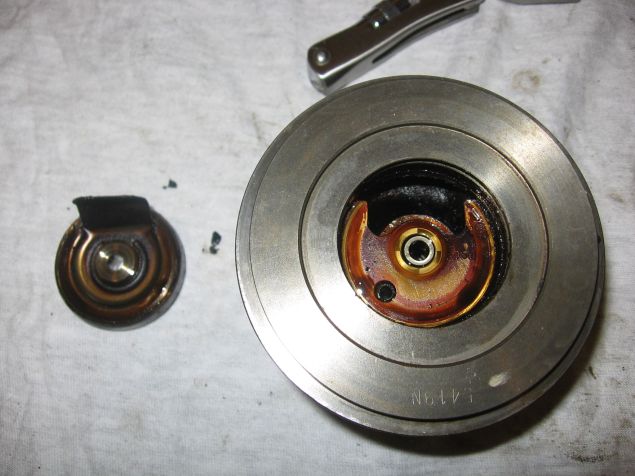
You should separate the compressor seal from the insert – they’re held together by a spring washer – your kit should have a replacement washer:
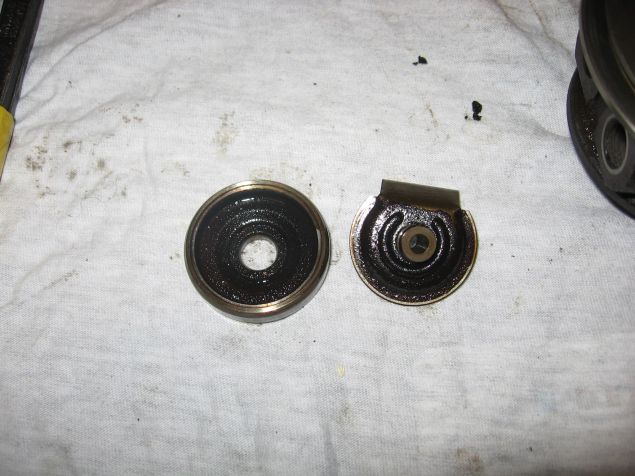
Gently prise up the bronze seal using a flat head screwdriver inserted underneath at the gap:
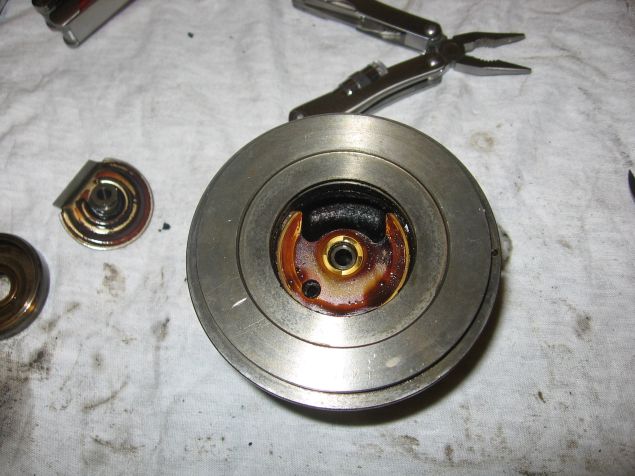
Out it comes. Eww, how much clag?
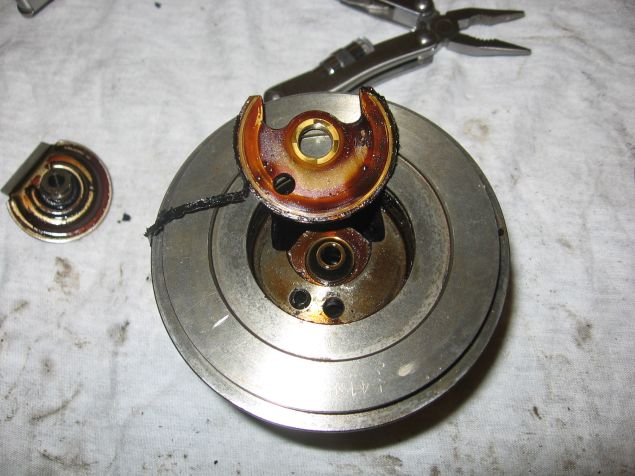
I turned the bronze seal over and compared it with the new one in the kit – see that ring worn in it? This is why we want to refurb 🙂
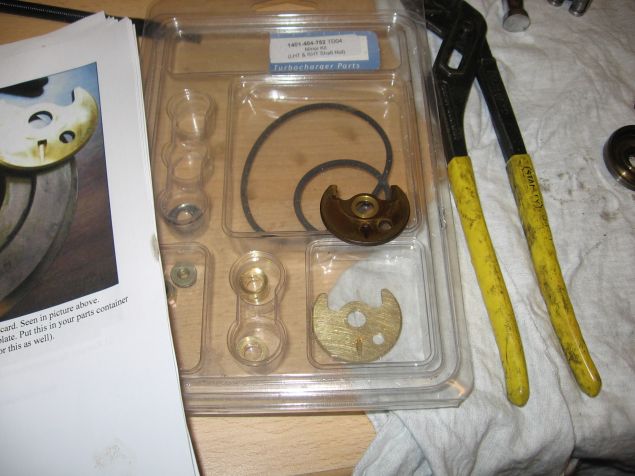
Remove the spacer which was under the bronze seal causing all that wear – it’s not attached in any way:
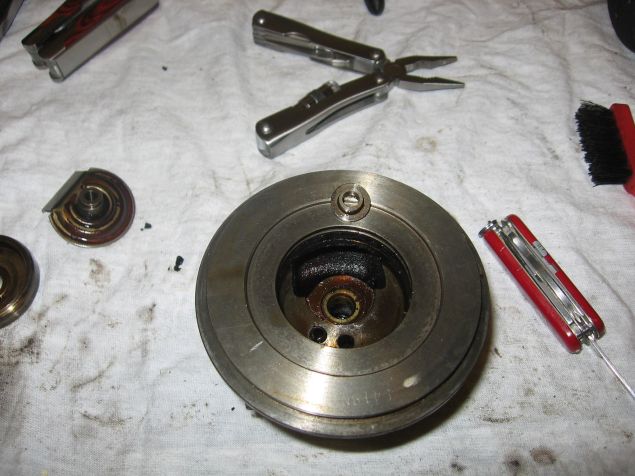
Remove the smaller, inner O ring – you should have a replacement in your kit:
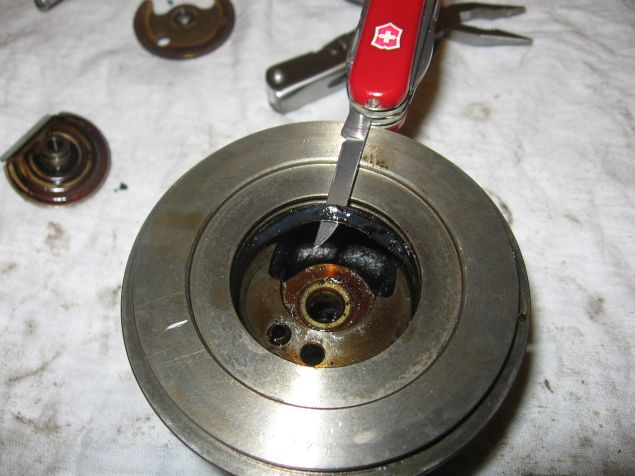
Remove the compressor-side bearing, your kit has a replacement:
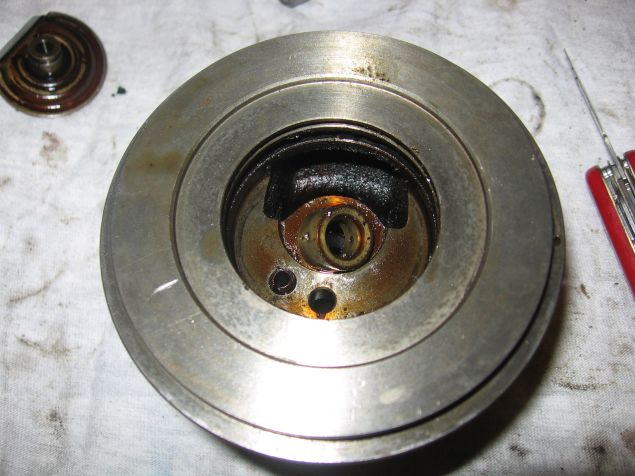
There we go, all empty CHRA and lots of mucky parts on the left:
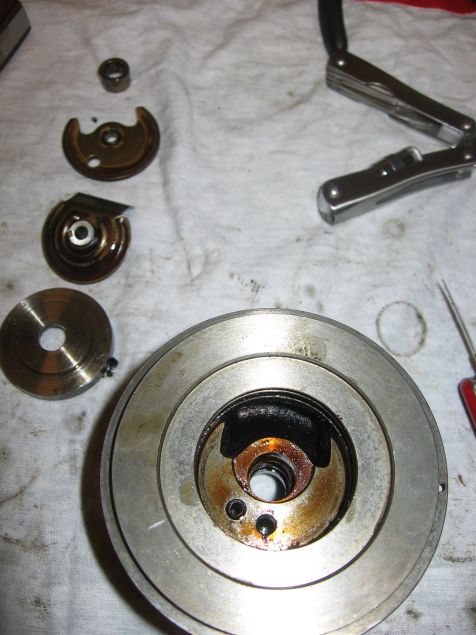
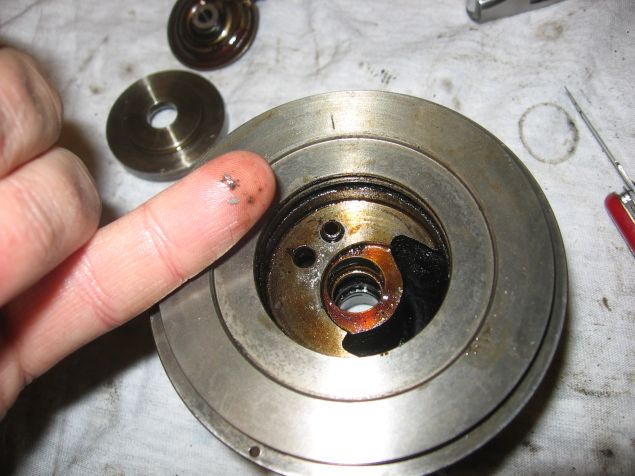
Hmm, don’t think it’s good for it to have all that rubbish floating around inside!
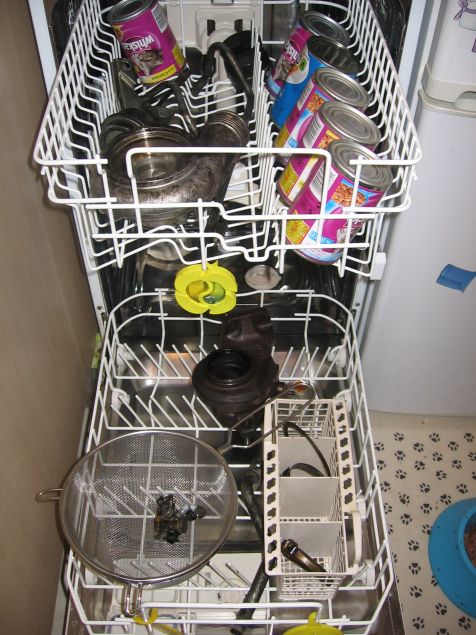
Time to clean up all the parts we’re not replacing – never let anyone tell you my wife’s not a saint 🙂 Intensive cycle (70 degrees), Tesco 5 in 1 lemon flavour tablet, Tesco rinse aid. The professionals probably have a better way of doing this 🙁 I put the stuff in the airing cupboard overnight to evaporate any water residue.
Nice clean CHRA:
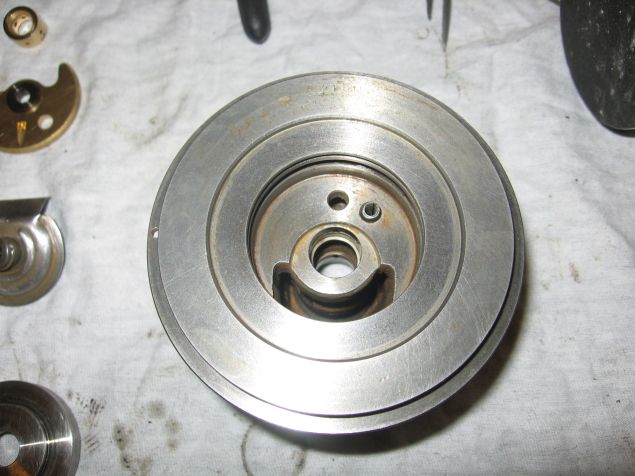
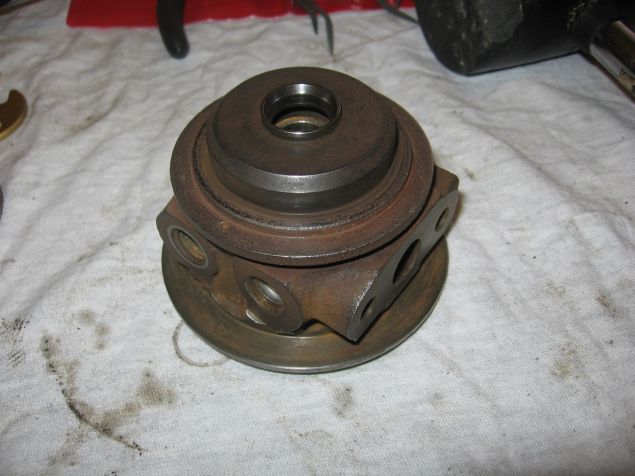
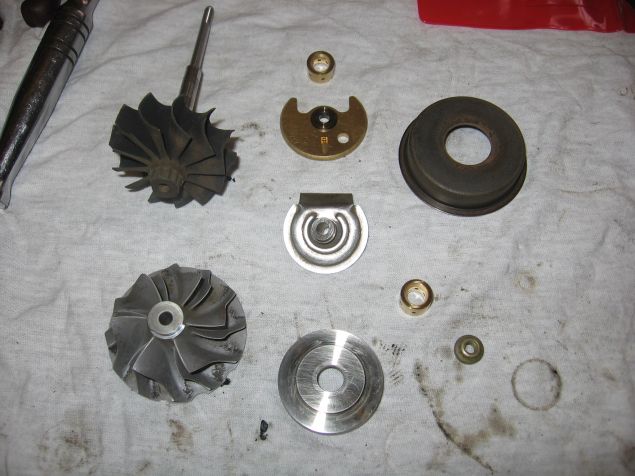
Nice new or cleaned parts. Looks quite simple really, doesn’t it!
Nasty old claggy bit heading for the bin:
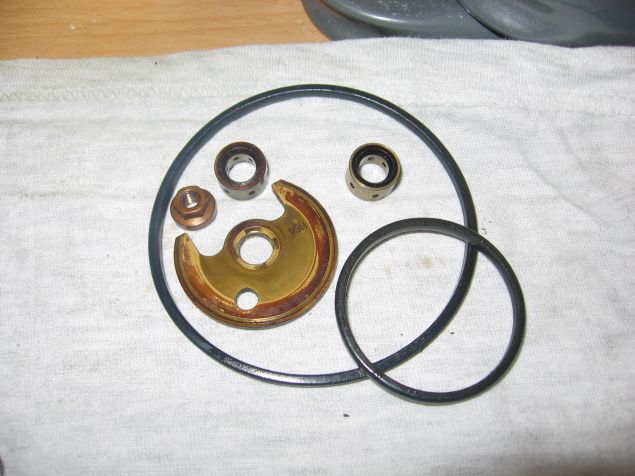
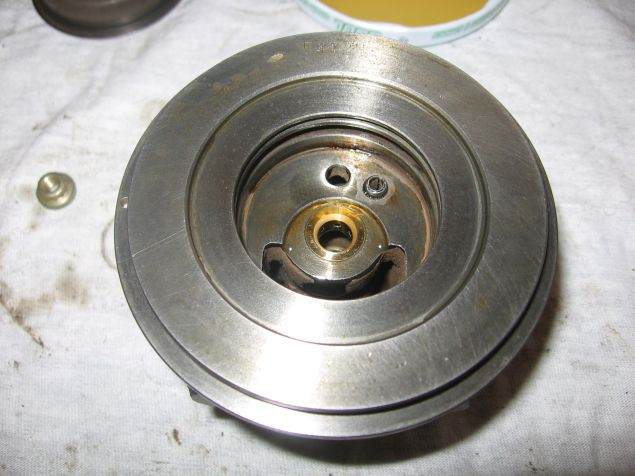
As I was reassembling, every part got a light coating in engine oil as it went in. Here’s the compressor-side bearing going in:
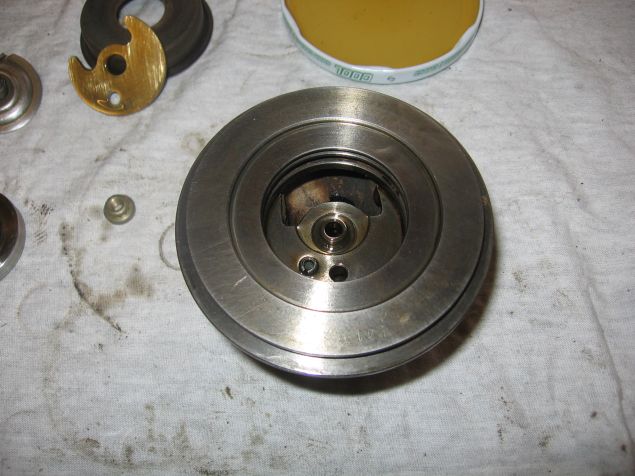
And the spacer:
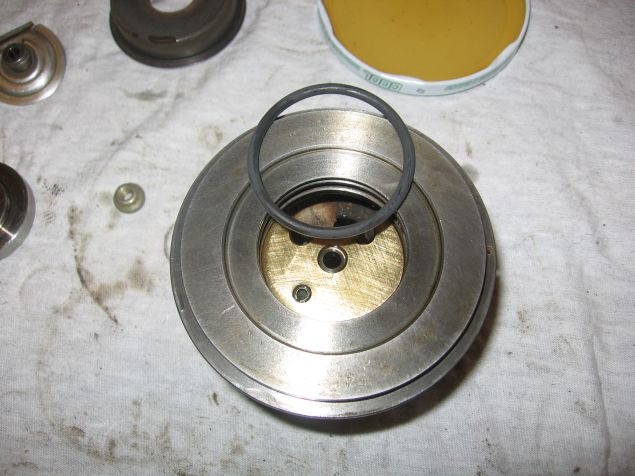
Next the bronze seal plate and the inner, small O ring:
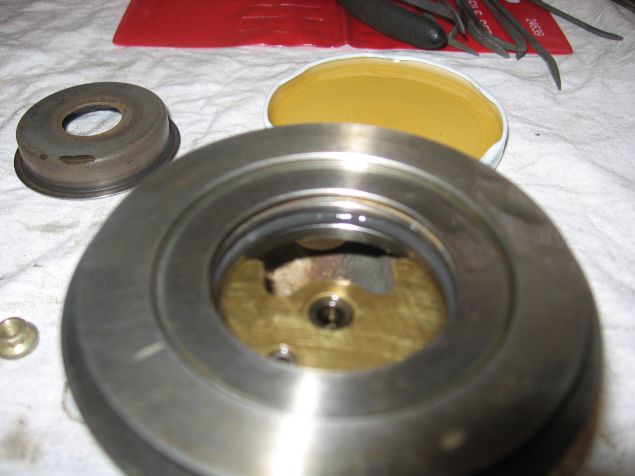
All in, and lubricated:
Remove the old spring washer:
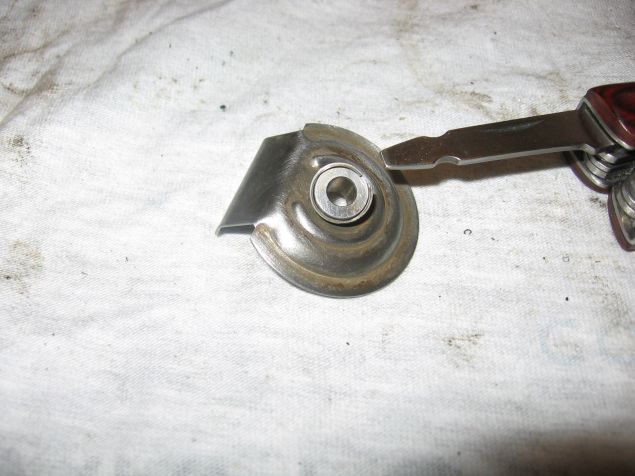
And fit the replacement one from your kit:
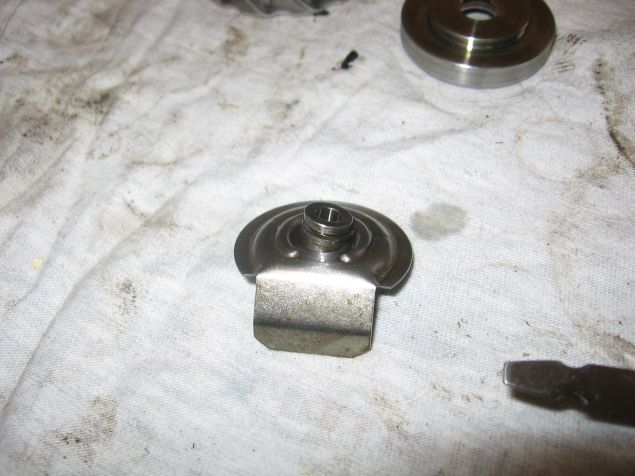
Re-fit, upside down on top of the bronze seal plate, fitting into its gap:
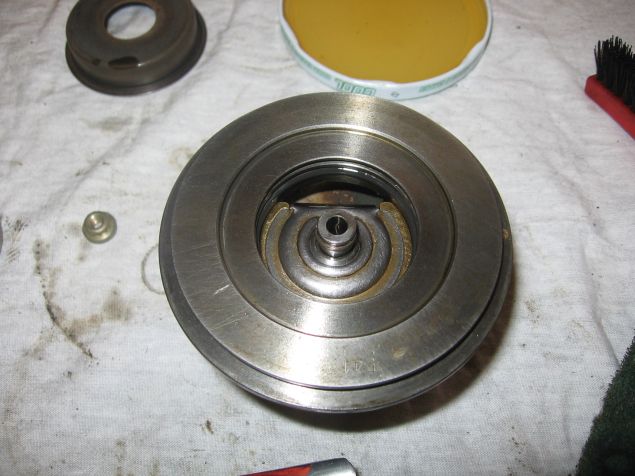
And replace the compressor seal. It’s a tight fit, so apply pressure carefully and evenly:
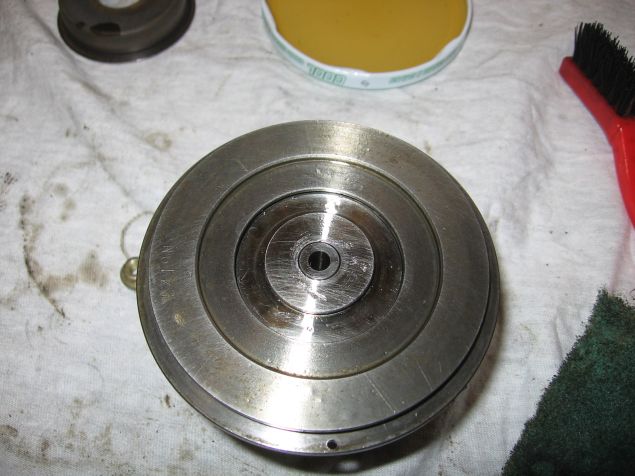
Ready to replace the small circlip (remember your safety glasses 🙂
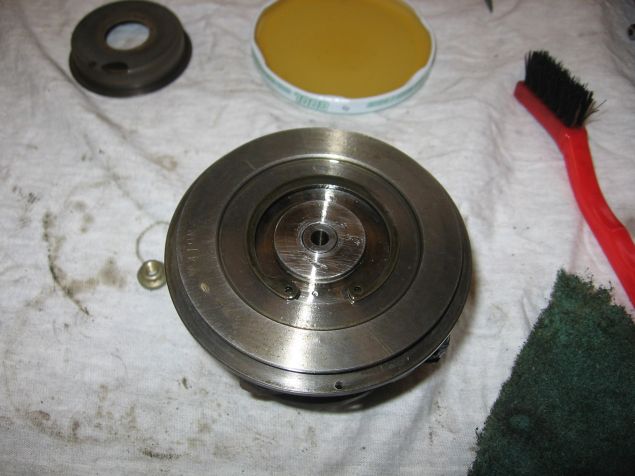
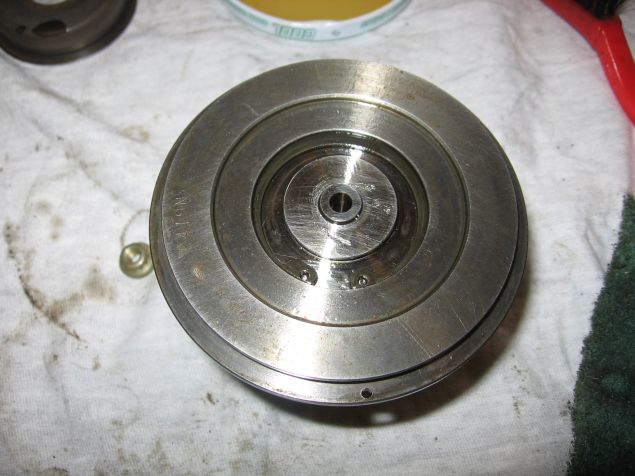
Make sure it’s home, if not the compressor seal isn’t in far enough!
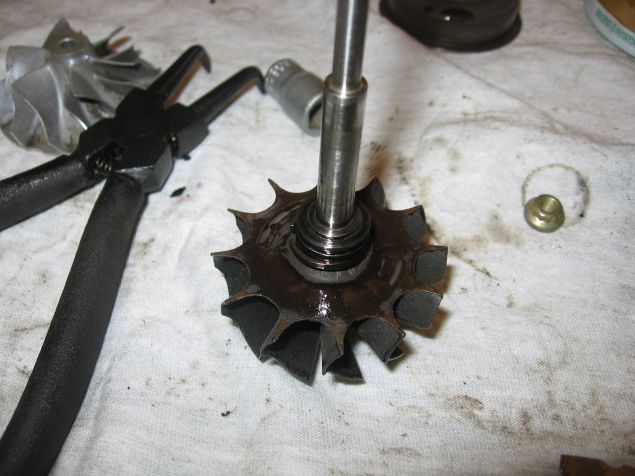
Replace the spring washer on the exhaust turbine:
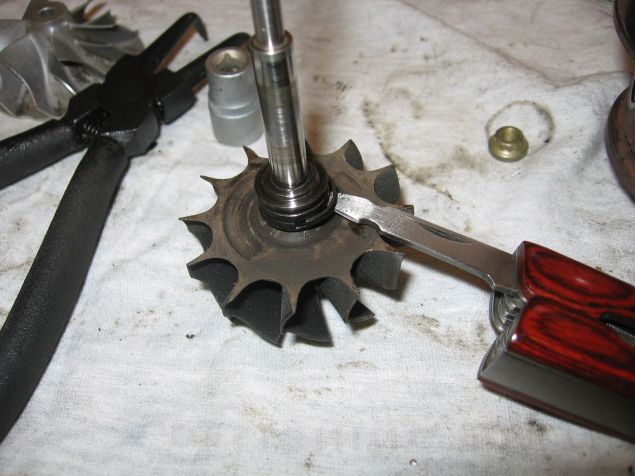
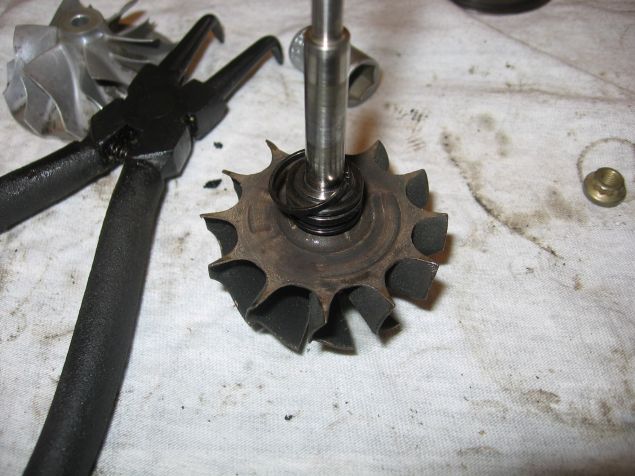
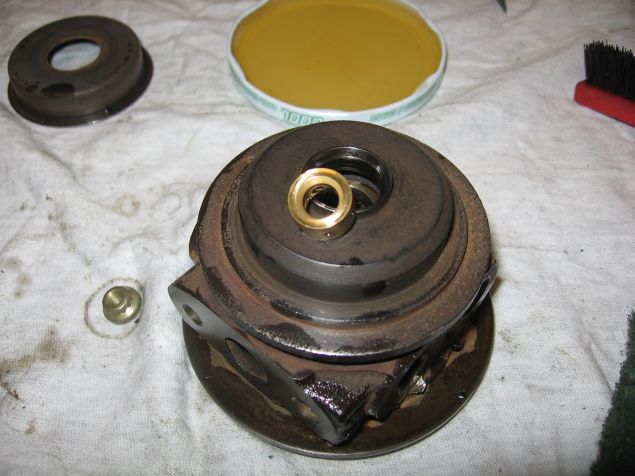
And pop in the new exhaust-side bearing:
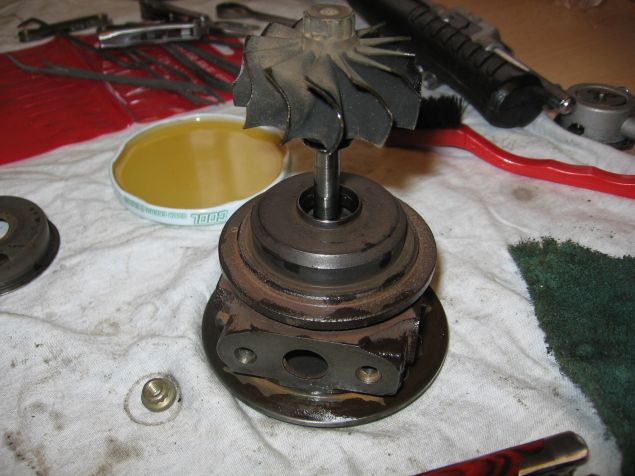
You can now replace the exhaust turbine and shaft into the CHRA:
It should ‘snap’ back in – you can look at this view to see whether the spring washer has worked as it should:
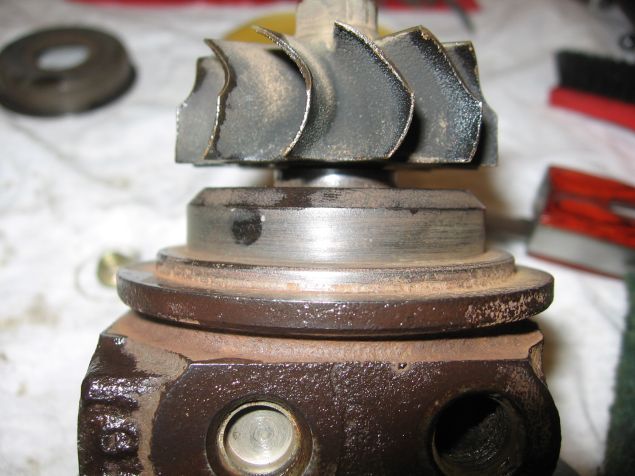
Here it is ‘snapped’ into place:
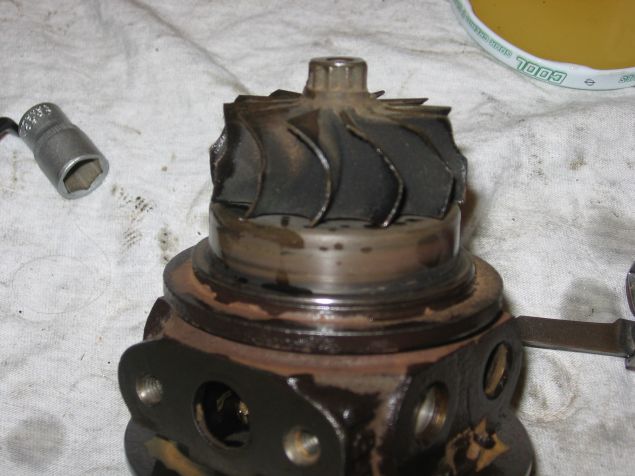
Now replace the compressor wheel at the other end, and BEARING IN MIND IT’S REVERSE THREADED wind on the new nut a bit:
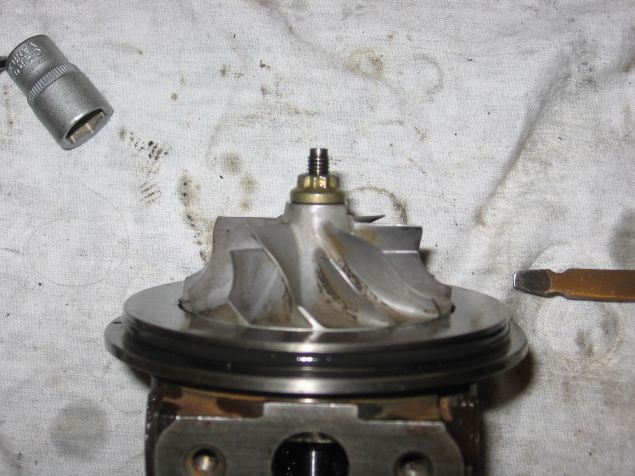
READ THIS BIT, IT’S IMPORTANT
The original guide I was following (credits at the end) didn’t have the correct torque value. So I guessed. I got it wrong:
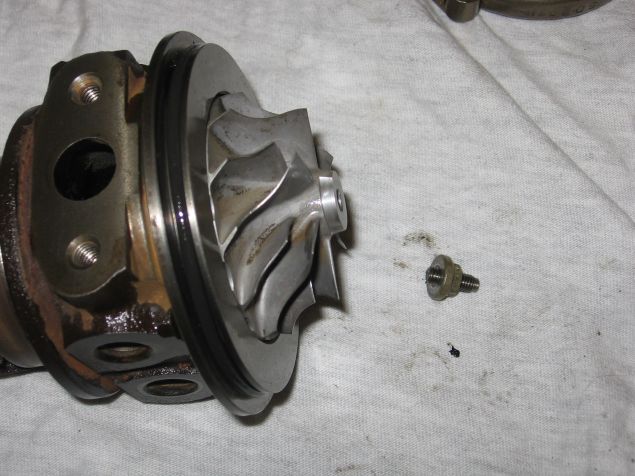
That was a £70 mistake – I have yet to find out if it’s repairable, I just sourced another turbo. I was pretty cross!
I had guessed at 25Nm based on the size of the nut and the bolt and I was off. Way off. After some research, you want to tighten the compressor nut to 2Nm, followed by a 1/4 turn.
I ended up buying a torque screwdriver from my local hardware store (£60) as nothing else I had would torque below 5Nm.
Also, bear in mind IT’S REVERSE THREADED so get something that’s reversible.
So, with that out of the way – ensure the exhaust turbine and compressor wheel are lined up as they were before. In my case, note the vane perpendicular to the flat on the ‘nut’, ensure the bottom of it is lined up with the alignment hole on the housing. Then, ensure the compressor wheel has the down stroke of the number ‘4’ printed on it lining up with the mark I made with the file.
If you look closely in this photo you’ll note the compressor housing from the 2nd donor turbo, and the blue torque screwdriver…
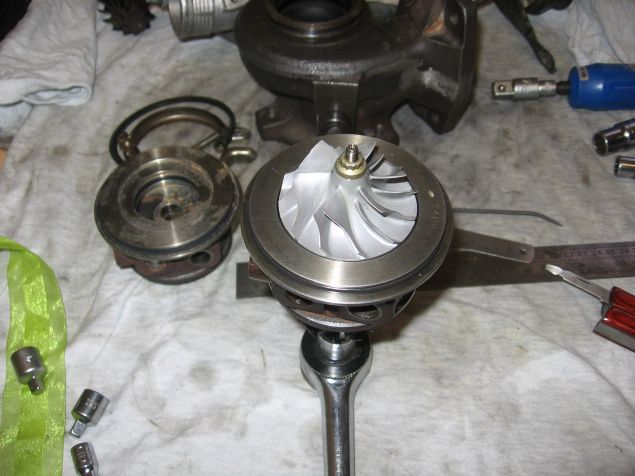
Noting the hole for alignment, replace the CHRA into the inlet housing, and with your safety glasses on replace the circlip. I think because of the new O rings the CHRA wouldn’t seat right in at first. With the circlip mostly in place I gave it a tap evenly around with a screwdriver and hammer, and the circlip then popped down into its groove and opened out. If in doubt, use the circlip pliers to force the circlip open into its groove.
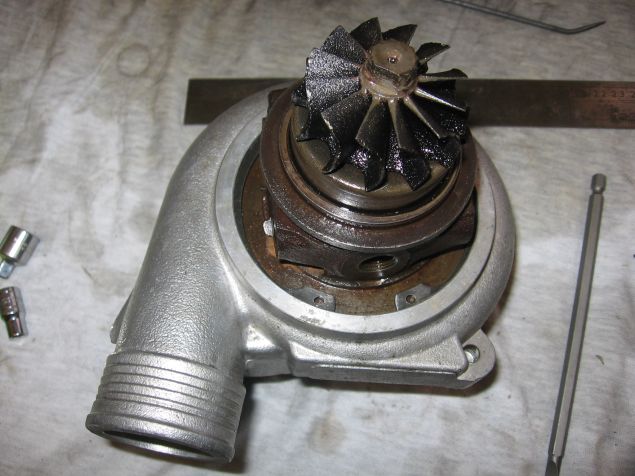
Replace the exhaust-side housing (use alignment hole) and central band clamp. Reattach ancilliaries such as recirculating valve. If you were thinking of going to a dump valve, there’s no easier access to those 3 10mm nuts than this 🙂
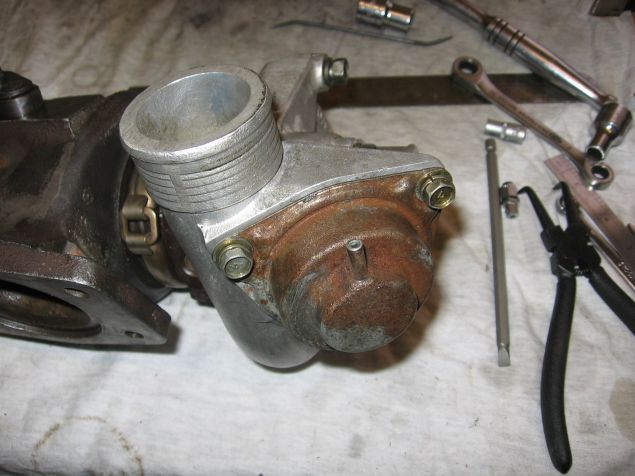
Check and re-fit the wastegate actuator. You’ll need a slim (1/4″?) 12mm socket to access one of the nuts.
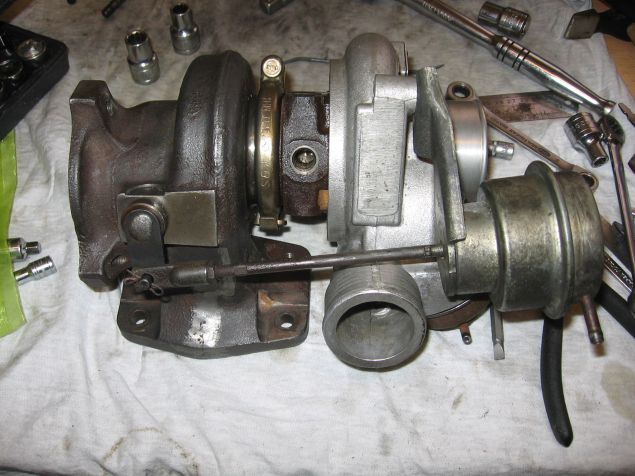
Right, end of turbo refurb – let’s try removing the old one from the car! I followed the Haynes manual and they rated it a 3 spanner job. I think I’d have classed it higher, based on the fiddly access, new scars and full swear box.
Toolwise, normally I get by with my trusty 1/2″ ratchet and sockets, some ratchet spanners and assorted old, crappy 3/8″ or 1/4″ bits and bobs. This wasn’t going to cut it, this time so I popped to Halfords and bought myself an early Christmas present – their 150 piece professional set (on offer £150 down to £100). Having a smaller ratchet and relevant sockets available (as opposed to an adaptor on a larger ratchet) made the job much easier – it may even have been impossible with my initial toolset. If you’re going to try this, have a full toolkit on hand or a 2nd vehicle and a nearby tool store 🙂
I popped to Volvo and got 4 replacement exhaust manifold studs and 3 replacement downpipe studs and 7 nuts. I also got 6 copper washers, 2 each for the oil inlet, water inlet and outlet banjo bolts. I’d only recently done the oil return gasket and rubber ring so I didn’t replace those. I couldn’t actually replace the studs in the exhaust manifold in the end, so I replaced the 2 from the turbo exhaust housing and the 3 downpipe ones. I did replace all the nuts though. Beware, the cost for those parts is not cheap! I was out around £60 for just those bits :-/
Follow the Haynes alongside any tips I give here, ‘cos I didn’t always feel like taking a photo – it was raining and I was cold 🙁
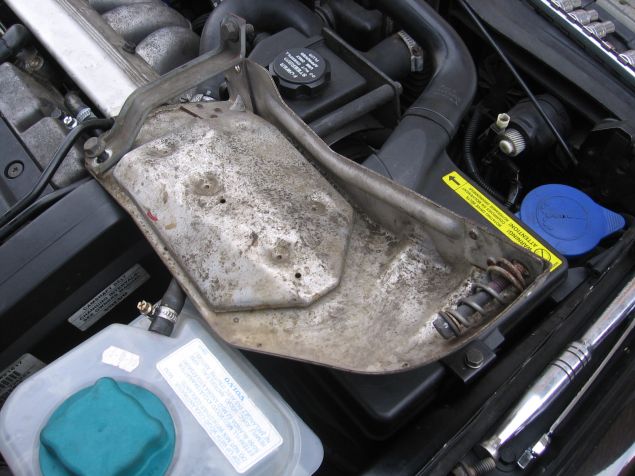
Remove this bit of the heatshield first:
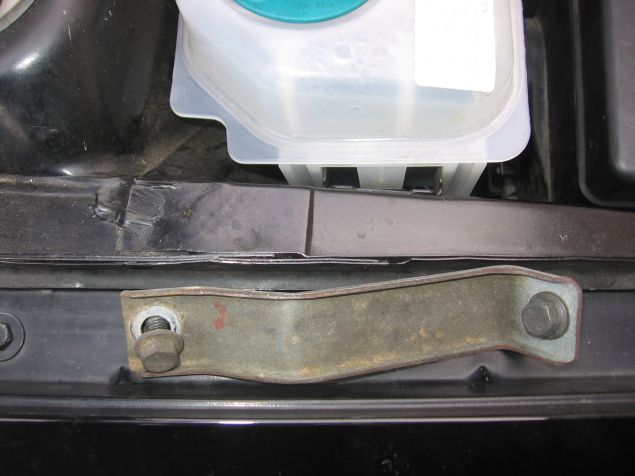
Now you can undo the horizontal part of the shield, 2 nuts at the exhaust manifold side of it (one has a spring):
Remove the intercooler pipe that goes over the top:
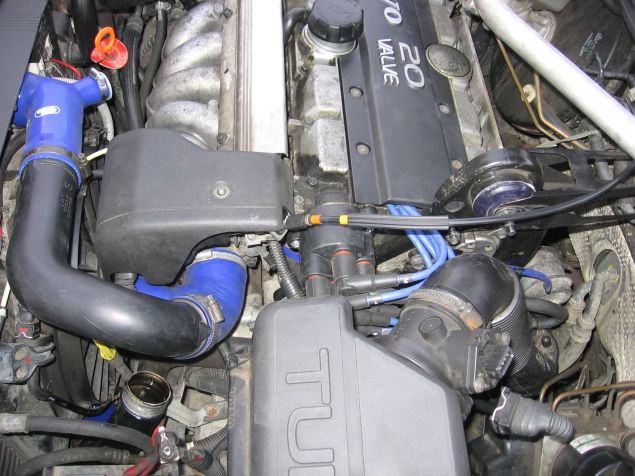
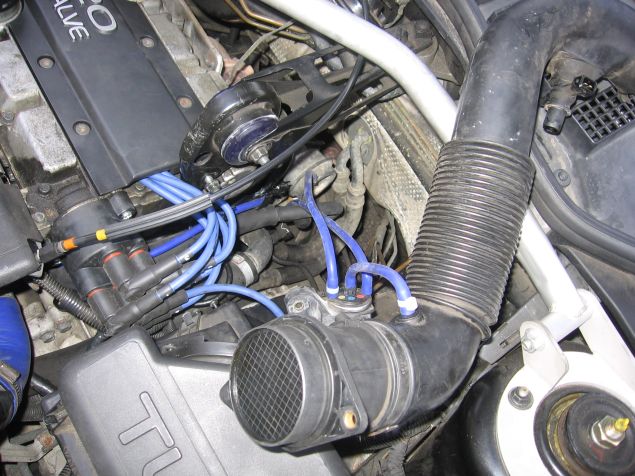
Remove the MAF and inlet air pipe, and Boost Control Solenoid (BCS):
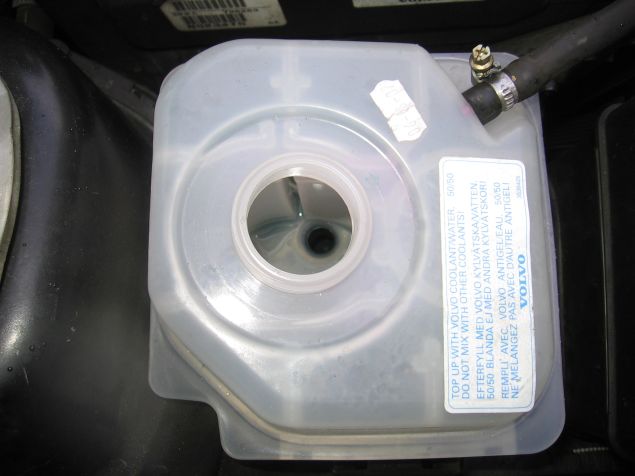
Drain the coolant (mine drops almost exactly 4l):
Remove the oil inlet banjo bolt. I found a stubby 17mm ring spanner was essential for this, access is very tight:
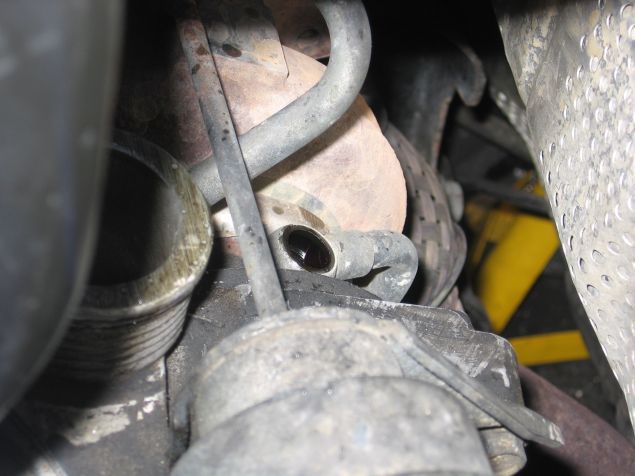
Once the top oil inlet’s off, you can do the rear-facing coolant banjo bolt. I couldn’t get any tool onto the front-facing water banjo bolt. In the end I disconnected the other end of that fixed pipe. Near the coolant expansion tank it’s joined with a short length of rubber hose to another hard pipe – I disconnected it here and withdrew the turbo with it still attached. I couldn’t undo it until I removed the CHRA clamp band!
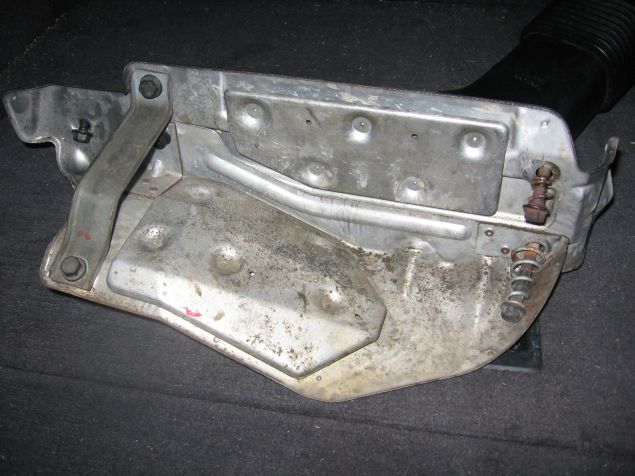
Around now you can get the vertical portion of the heatshield out. It’s a pain to get out of the engine bay! The curved end near the expansion tank can be dropped down, and then pulled up out near the brake fluid reservior in its ‘tall’ orientation:
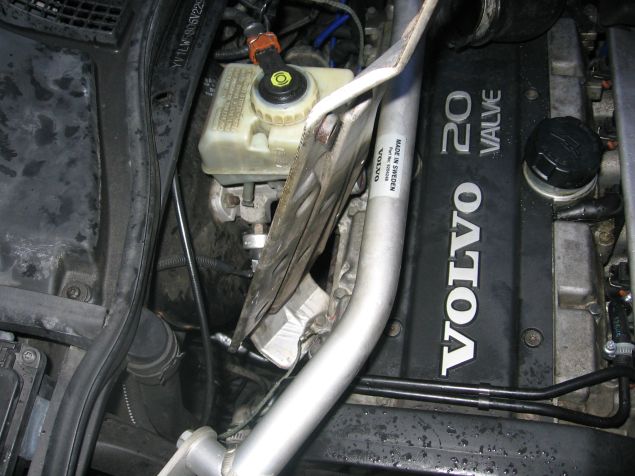
Here’s a shot of how it goes back together in case you’re struggling 🙂
The exhaust and downpipe nuts are a pain – soak them in WD-40 before you start, and have a range of 12mm options open to you. I used a 1/4″ ratchet, a 3/8″ ratchet and a 12mm ratchet, wobble bars, extension bars, a ratchet spanner, a ring spanner and a hammer to tap some of them free. Once they’re all off, you should be able to start manhandling the turbo off the exhaust manifold then then the downpipe.
I initially tried to remove the turbo without taking off the oil return pipe that goes to the sump. I think this might be possible, but I was getting something sticking, so jack the car back up, take that off (it had come out of the sump) and car back down again. I think I also had trouble fouling the oil inlet pipe, and even bent it slightly ‘cos it required some ‘persuasion’ on the re-fit!
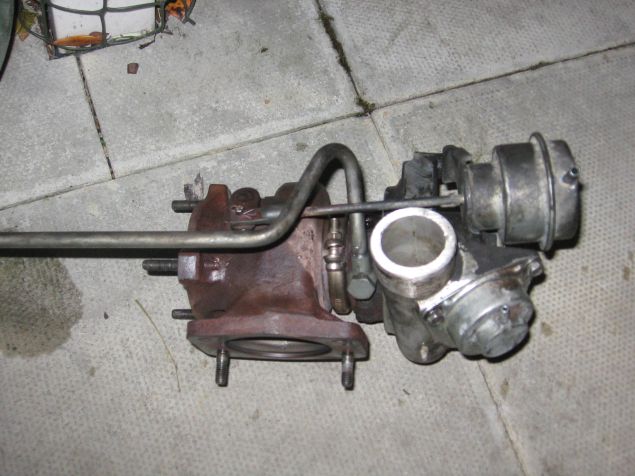
You may have to pry the turbo away from the manifold and or downpipe, but eventually it will come away, up and out past the ABS unit and upper engine mount.
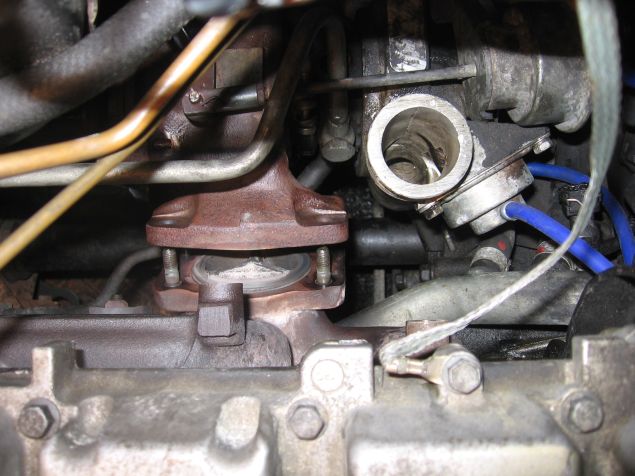
This shot’s mostly so I remember which BCS hoses go where…
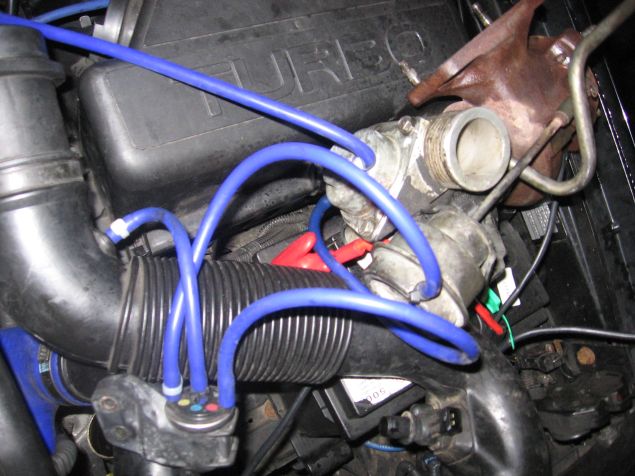
Nice big gap – gotta feel sorry for all the NA folks 🙂
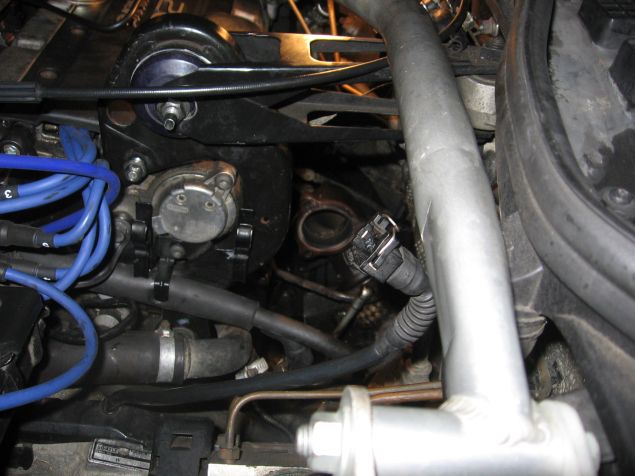
There’s the original turbo, as it was removed. See what I mean about the coolant pipe and its inaccessible banjo bolt 🙂
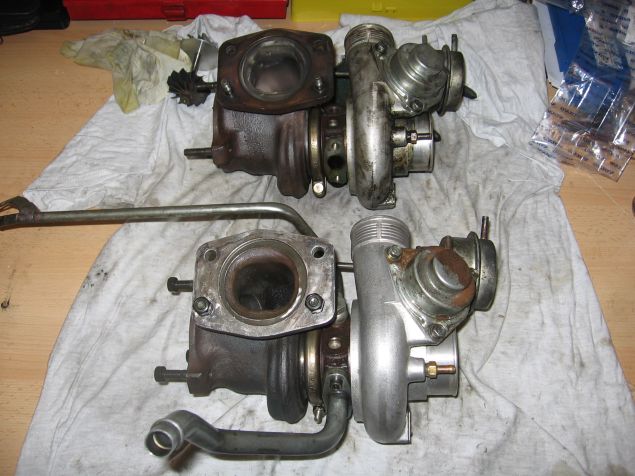
Old turbo at the top, refurbed one at the bottom… (broken turbine shaft from 3rd turbo just visible top left)
And… Job done! Thank goodness for that 🙂 Once I refilled the coolant, I started her up.
As the engine came up to temperature I started getting white smoke! Eek! Was quite worried – killed the engine, removed the heatshield (damn heatshield) and inspected carefully. The rubber hose joining the two hard coolant pipes was dripping so I tightened that jubilee clip but nothing else was evident. Started her again and kept careful watch but couldn’t figure out where the smoke was coming from. Blipped the throttle cable but still no clues.
My only hope was that I’d got oil all over the exhaust housing, and it was now burning off. I took the car round the block (with some spare top up coolant) and kept checking it. Eventually the smoke died down, and hearing no nasty grinding noises I got the confidence to open her up a little.
She was boosting slightly harder than before (according to the stock boost gauge) which was nice. I topped up the coolant but the smoke didn’t return.
On a slightly longer run I checked the average MPG on a stretch of dual carriageway and was please to find it about 4MPG higher – longer term testing will tell if that’s really the case…
So, that’s what I’ve been up to all weekend! I should really start saving for a nice workshop with lift – I’m fed up of doing jobs like this in the rain and cold 🙁
Have fun if you attempt this yourself 🙂 Cheers, Pete
The instructions in this tutorial will work in the following models / years:
– 1991,1992, 1993, 1994, 1995, 1996 and 1997 Volvo 850 Petrol Engines
– 1997, 1998, 1999 and 2000 Volvo S70 Petrol Engines
– 1997, 1998, 1999 and 2000 Volvo V70 Petrol Engines
– 1997, 1998, 1999, 2000, 2001, 2002, 2003, 2004 and 2005 Volvo C70 Coupe and Convertible / Cabrio Petrol Engines
